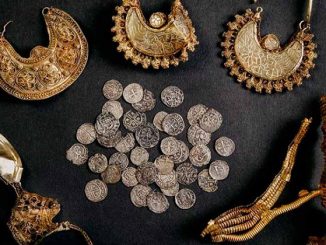
Crafting gold and silver jewelry must follow strict procedures. Because of its simplicity, making jewelry is extremely complicated and must go through many stages. Jewelry not only enhances the beauty of the user, but it also carries a lot of spiritual value. Join us to learn about the 11 stages of making gold and silver jewelry through the article below.
1.Prototyping phase
This is the first stage in the process and also the most important stage, this job is the job of the design and prototyping department. Here, the most primitive ideas for a new jewelry model will be formed, designers can sketch products based on available products or from sources from magazines or documents. materials to bring inspiration and creativity to them.

After having an idea, the designer will sketch 2D on paper (draw by hand and often use a pencil to sketch ideas on paper) and then create a 3D model of the product. However, for those with long experience, they will skip the 2D drawing step and directly design 3D using specialized software such as 3Ds Max, Rhinoceros, Artcam jewelsmith, Modela Player 4… After completing the drawing. Basic 3D modeling, these models will be put into rendering programs such as Vray, HyperShort to perform the beading and gluing process right on the 3D model. After completing the design process, we will have a lifelike jewelry model in 3D with a 100% size ratio that it will form.
2. Wax modeling stage
From the 3D model, the ring model will be exported and engraved on hard wax. The wax is turquoise or dark green. Wax patterns can be made manually or by machine.
If doing it by hand, the necessary tools are knives of many sizes, saw blades, needle points, files, small drills, small lathes…
3.Place the pine tree – pump wax
Inserting the pine tree means that before casting, small and large wax samples are inserted one after another from top to bottom evenly on a fixed pouring tube located on a rubber base. People will take this pine tree (without the rubber sole attached) to calculate the weight of gold or silver metal for casting. Once you know the weight of the metal that needs to be cast, it will be recorded as the weight and price.
There are some products that require beads before being plastered because it is easier to attach beads/stones on wax than on semi-finished products.
4.Pour plaster
The pine tree would be placed inside the crucible, and the crucible would be filled with plaster. The plaster will then harden and hold the pine tree (with the wax pattern attached) inside.

5.Metal melting
The crucible containing the mold is placed in the furnace for several hours until the pine tree (to which the wax pattern is attached) is melted, leaving a hollow mold cavity in the shape of the pine tree and wax pattern. Next, the metal is melted to prepare to pour into this empty mold cavity.

6.Molding
Here there is a vertical shaft molding machine that rotates at extremely fast speed to create centrifugal compression that pushes the liquid metal into the crucible and fills the mold cavity.
7.Cut the pine trunk out of the raw product
The raw product is removed from the crucible, still sticky with plaster and darkened. The pine tree-shaped molding is cut out of the rough ring product and the finishing process begins.

8.Finishing rough products
At this time, the raw product has been cut, trimmed and polished to complete the product’s shape. This may be the final step in some jewelry making processes, but for some products some other steps are still needed.
9. Attach stones
After the product body has been completed, more detailed steps, such as stone setting and carving, continue to be performed. The spoke is cut and forged to hold the stone/diamond on the piece.
10. Polish the product
After completing the stone installation, continue the final polishing step. In this step, the machine system has high-speed rotating wheels and some substances are used to polish the jewelry.

11.Quality check
Each product is rigorously quality tested to ensure precision and impeccable craftsmanship. At this step, valuation of the jewelry can be carried out.
After going through a rigorous manufacturing and testing process, a gold and silver jewelry product was born and awaits its beloved future owner.
However, with such a jewelry making process, you will definitely encounter many difficulties such as:
- Design samples are stored in disarray. When it is necessary to produce a product code, finding and describing the model takes a lot of time, even having to draw it by hand on paper to describe it to the worker.
- You are the owner, but your main job of the day is to weigh – measure – check – count to deliver to workers instead of meeting and looking for customers!
- You cannot determine the exact loss, so you often deal with “feelings” when approving the loss with the worker
- You don’t know the cost of producing an item, so you’re not sure whether the labor price you offer is competitive with other factories or not.
- You apply cross-checking to reduce losses, resulting in the accountant giving you a stack of reports printed from Excel at the end of the day, but you’re really not sure about the accuracy of the numbers in them…