Lemon bars, with their perfect blend of sweet and tart, have long been a favorite dessert for many. In this guide, we’ll dive into the world of lemon bars, exploring every step of the process, from crafting the buttery shortbread crust to achieving the ideal balance in the lemony filling. Get ready to elevate your baking skills and treat your taste buds to a burst of citrusy goodness!
The Foundation – Shortbread Crust Mastery
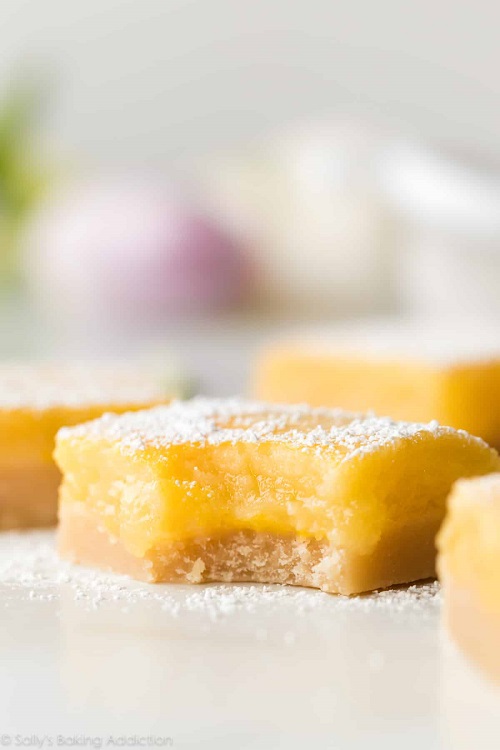
The journey begins with the foundation of any great lemon bar – the shortbread crust. Melted butter, granulated sugar, vanilla extract, and a dash of salt come together in a harmonious dance of flavors. The addition of precisely measured all-purpose flour creates a thick and velvety dough. Pressed into a parchment-lined pan, this crust undergoes a transformative 20-22 minute bake until the edges achieve a perfect golden brown. The key step here? Poking holes with a fork, a technique that ensures the filling adheres and the crust maintains its integrity.
Crafting the Lemon Symphony – The Filling
With the crust setting the stage, it’s time to turn our attention to the star of the show – the lemon filling. A meticulous blend of granulated sugar, flour, eggs, and freshly squeezed lemon juice creates a symphony of flavors that will tantalize your taste buds. Whisking these ingredients together forms a luscious filling poured over the warm crust. A 22-26 minute bake ensures the center achieves the perfect set, creating a dessert that’s both visually stunning and irresistibly delicious.

The Art of Cooling – Patience Rewarded
Once the bars emerge from the oven, exercise patience as they cool to perfection. Allowing them to reach room temperature for approximately 2 hours, followed by an additional 1-2 hours in the refrigerator, results in a chilled delight that enhances the overall experience. This step is crucial for achieving the ideal texture and ensuring the bars hold their shape when cut. The reward for your patience? Lemon bars that are as visually appealing as they are delectable.
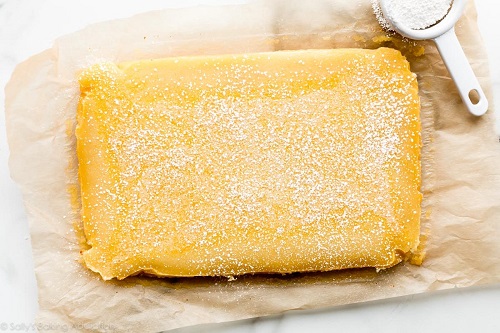
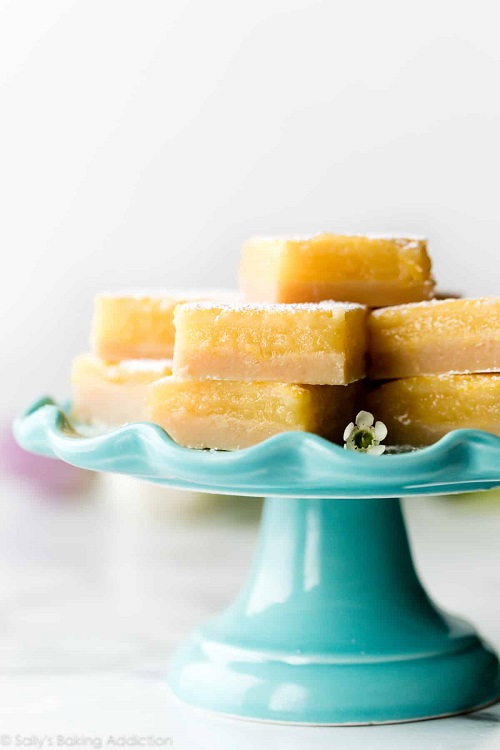
Presentation and Preservation – Serving with Style
Presentation is key when it comes to lemon bars. Lift the chilled bars from the pan using the parchment paper overhang for easy handling. A dusting of confectioners’ sugar adds a touch of elegance, creating a dessert that’s as pleasing to the eyes as it is to the palate. For neat squares, a clean knife wipe between each cut is a pro tip. Leftovers? No worries. Store these delights in the refrigerator for up to 1 week, maintaining their freshness and flavor.
Beyond the Moment – Freezing for Future Indulgence
For those who relish the idea of having lemon bars at their fingertips whenever the craving strikes, freezing is the answer. These bars can be frozen for 3-4 months without compromising their quality. The process is simple: cut the cooled bars, omitting the confectioners’ sugar topping, and freeze individually wrapped bars. When the time comes to indulge, thaw in the refrigerator and dust with confectioners’ sugar before serving. A frozen treasure trove of lemony goodness awaits you.

As you embark on your journey to master the art of lemon bars, relish the sweet success that comes with each perfectly crafted bite. Whether you’re a seasoned baker or a novice in the kitchen, these steps ensure a delightful dessert experience. So, gather your ingredients, preheat the oven, and let the aroma of freshly baked lemon bars fill your kitchen. Happy baking!